If you’re boosting posts or running Facebook ads, getting your audience right is *key*. Targeting too narrowly, getting geography wrong, or creating the wrong audiences can increase your costs and lead to ineffective results.
But not to worry, because today, we’re filling you in on the five audiences you should create before you get started and how to set them up in Facebook Business Manager.
The first thing you’ll need to do is log into your Facebook Business Manager. Once you’re in there, the easiest way to set up an audience is to click the “Audiences” category on the top left-hand side.
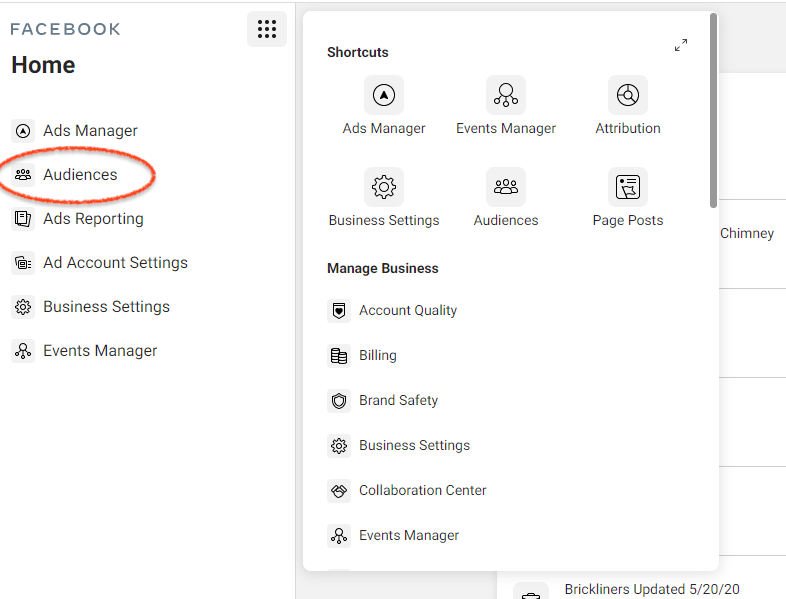
Note: If you don’t see it here, scroll down and you should find “Audiences” under the “Advertise” section of the page.
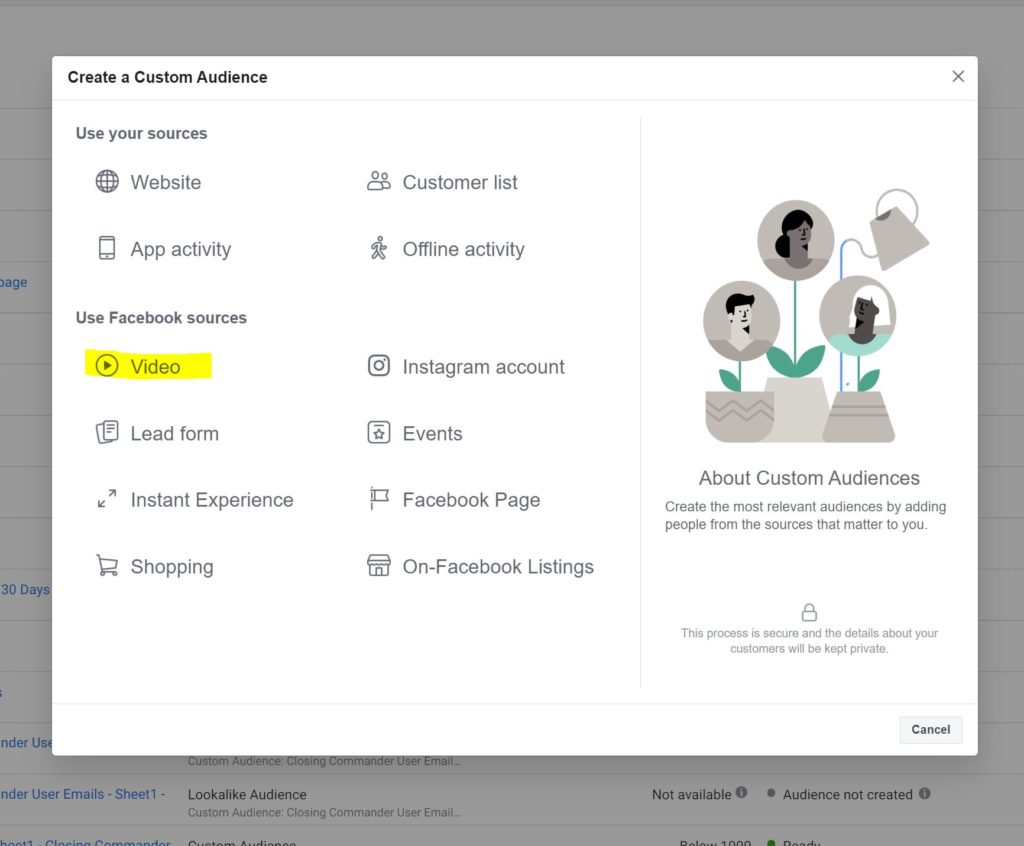
From there, you’ll click the “Create Audience” dropdown and select the type of audience you want to create. The three “types” of Facebook audiences we’re going to be worrying about today are saved, custom, and lookalike.
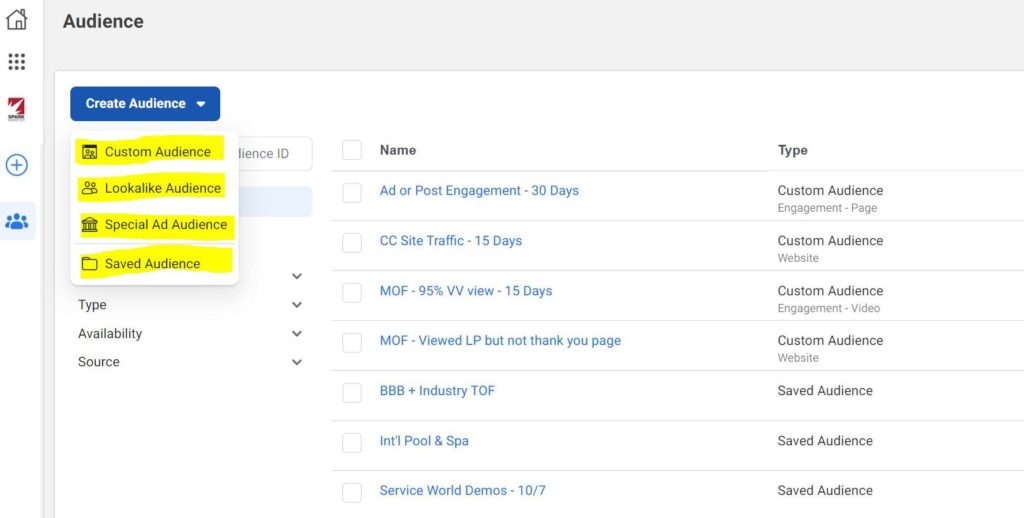
A saved audience is an audience that’s created based on information you have or own. You’ll need to manually input this information in order to create this type of audience.
A custom audience is created based on an action or engagement. For example, a custom audience might consist of people who downloaded a lead gen, clicked an ad, visited your website, engaged with a Facebook post, submitted a form, or took some other type of action.
A lookalike audience is an audience that’s created based on the demographics of your existing customer base. It requires input of information — like the names, email addresses, addresses, and zip codes of your customer base — and Facebook uses that info to find your customers’ Facebook profiles and create an audience that “looks” similar to them.
Note: In order to create custom audiences, you MUST have the Facebook Pixel installed on your site. Otherwise, these audiences won’t work for you.
Now that you know the basics, let’s dive into the five audiences you need to create before boosting posts or running Facebook Ads.
#1 Geographic & demographic audience
This first audience is a “saved” audience that will target people in a specific area. You’ll need to manually input some information to create this audience.
What information do you need to add? The zip codes, cities, or counties you’d like to target and the age range you’d like to target.
You may be tempted to narrow down your audience further with more filters, but Facebook likes to work with broader audiences, so we recommend stopping with location and age.
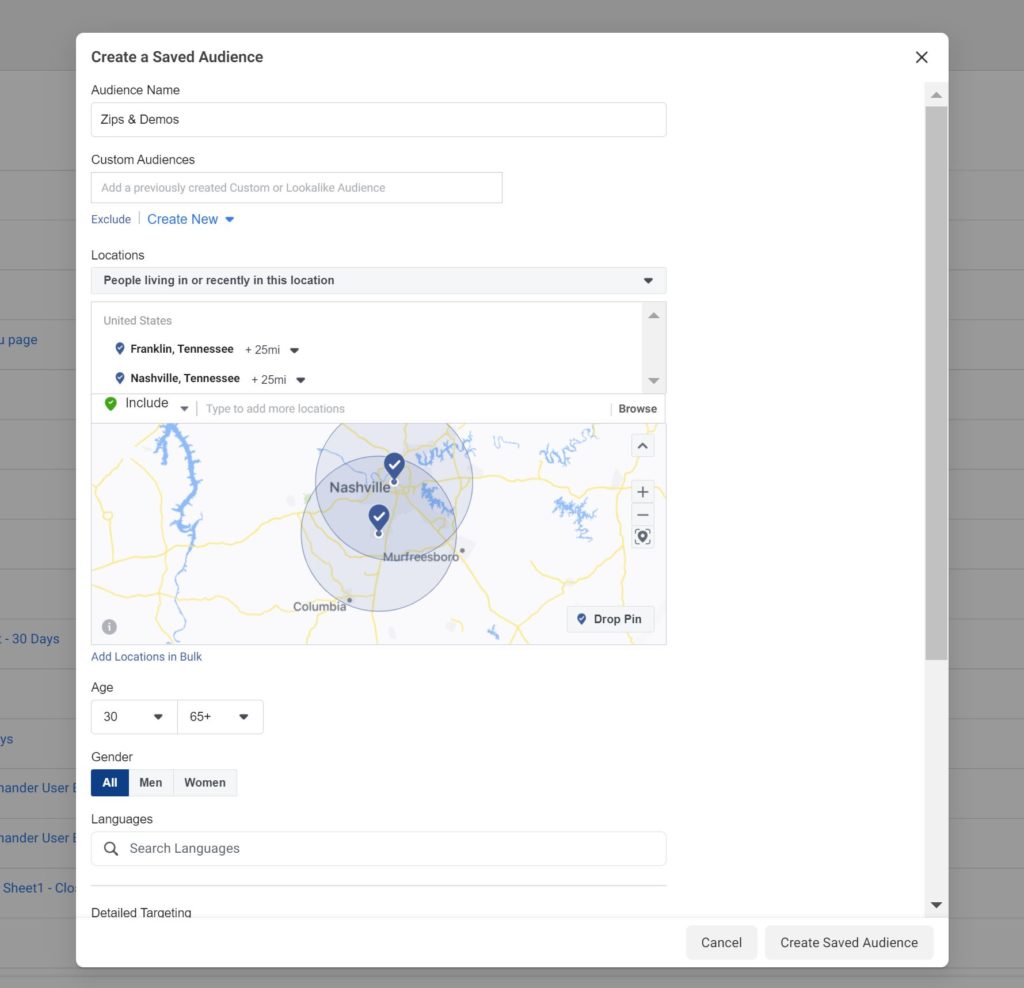
If you know that your buyers are predominantly male or female, you can choose to target a specific gender, but we recommend just inputting the location and age range of your ideal customers.
Keep in mind, Facebook knows that, as a home service business, you want to target homeowners over apartment owners. So you don’t need to add that type of information. In fact, if you choose to continue narrowing down your audience, you could actually hurt your efforts and increase your costs.
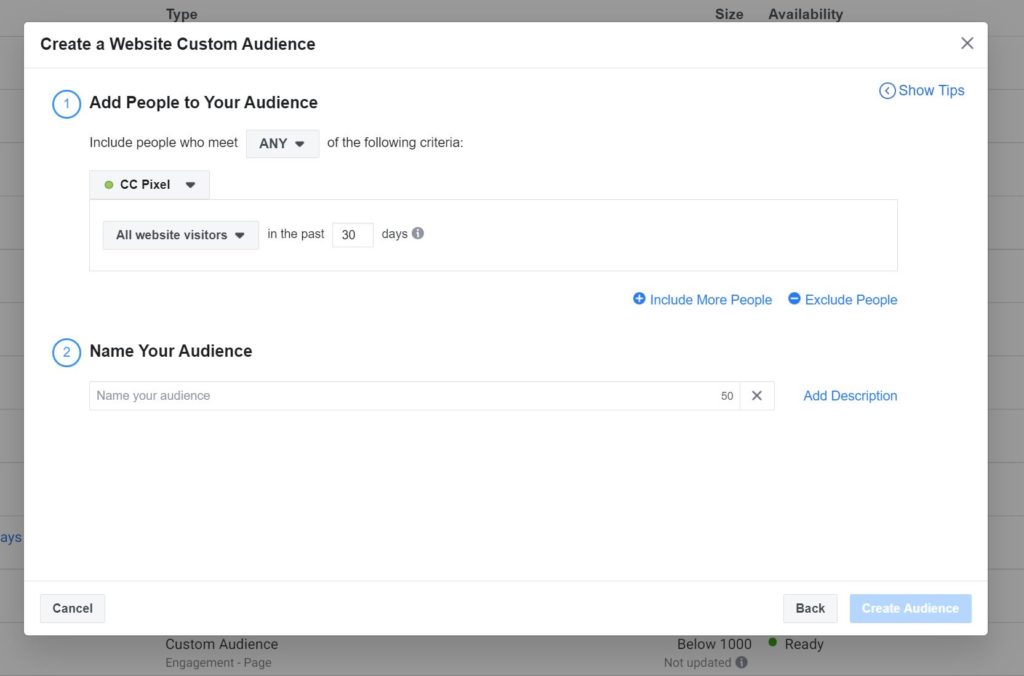
#2 Website retargeting audience
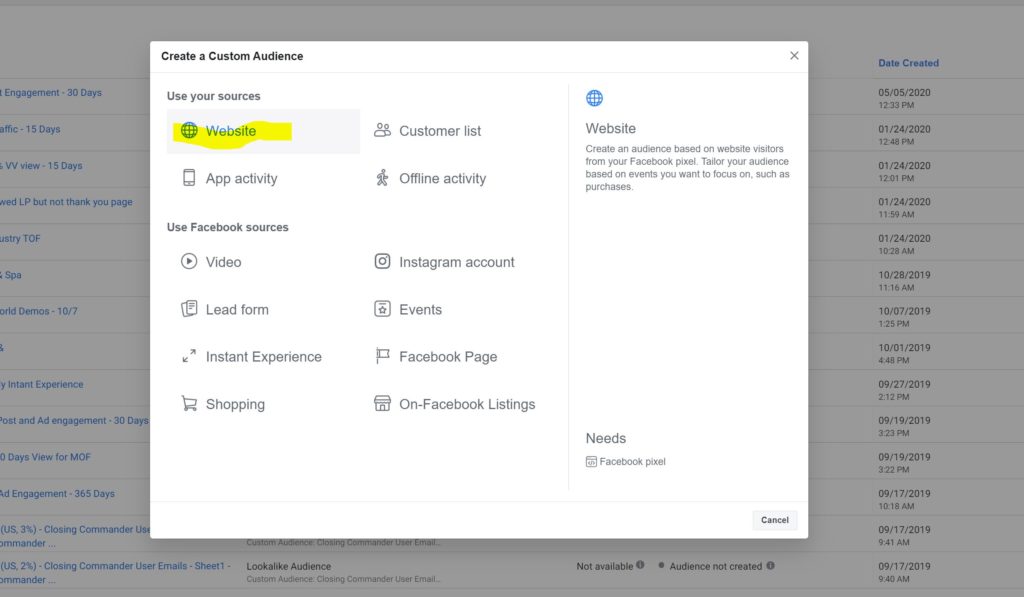
The second type of audience you’ll want to create is a custom audience that will consist of people who have visited your website within a certain time period. To create this custom audience, you’ll need to click “website” in the custom audience dashboard.
We recommend targeting website traffic using a 30-day window. 45 days is way too long to keep someone in your funnel, and while 15 days is ideal because you’re retargeting them closer to the actual website visit, most websites aren’t going to have enough traffic for a 15-day retargeting audience. So for most home service businesses, it makes sense to set the custom audience to include people who visited your website in the last 30 days.
#3 Video views retargeting audience
Next, we’re going to create an audience that consists of people who have engaged with our videos on Facebook. This is also a custom audience, so you’ll need to click on “Create Audience,” “Custom Audience,” and then “Video.”
Select any of the recent videos you’ve posted on your Facebook page, and choose to target people who have watched 3-seconds, 10-seconds, or 95% of the video/videos.
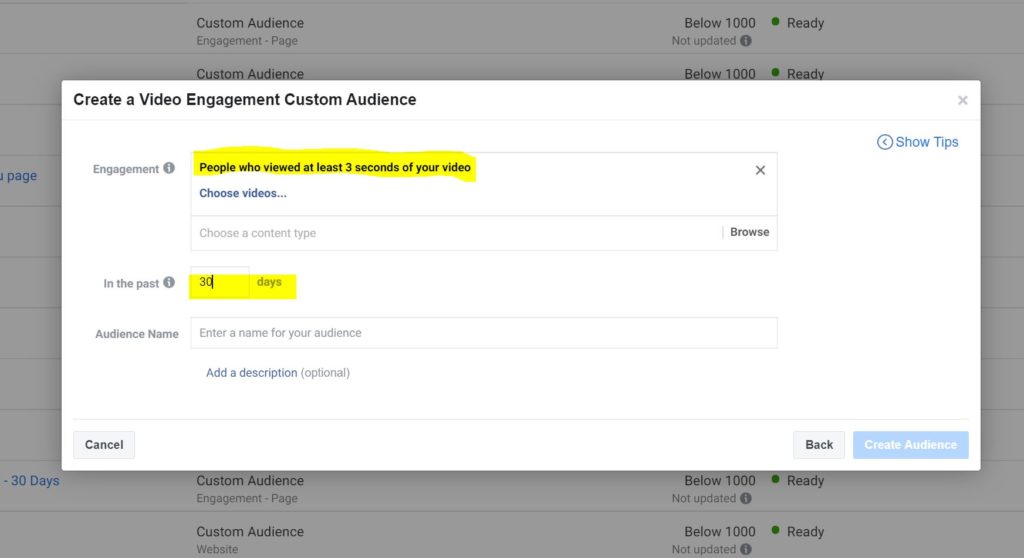
If you have a really strong video watch rate, we would recommend 10-seconds, but if you just want to get people to engage with you again, selecting 3-seconds is fine.
#4 Customer list lookalike audience
If you have a customer list, you can actually upload it to Facebook to create a custom audience that consists of similar people.
Before you upload your list, make sure it includes your customers’ names, zip codes, emails, and phone numbers. The reason your list needs to have all of these things before you upload it is that Facebook needs this information in order to match up your customers with their Facebook accounts. From this information, Facebook will then create a lookalike audience – an audience that looks like your existing customers.
You’ll have the choice of choosing from 1-10% in terms of how closely you want your new audience to match your customer list, but we recommend going with 2-3%.
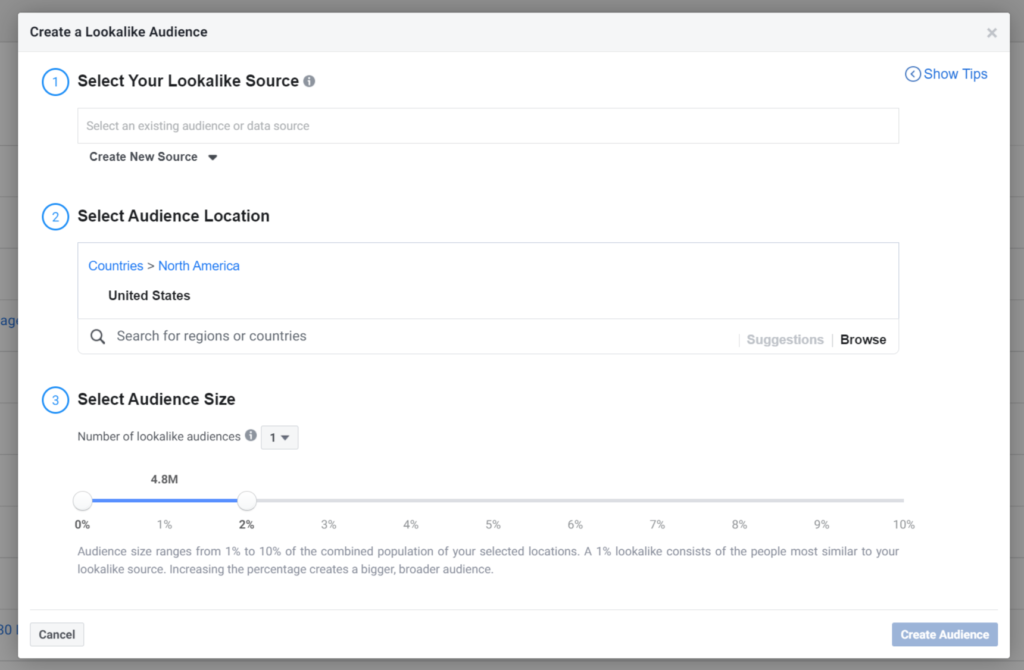
Super important note on lookalike audiences: Make sure you select the location targeting for your lookalike audience, specifying state, county, or zip code. Otherwise, your lookalike audience will default to cover the entire U.S., and you’ll be paying to put ads or boosted posts in front of people who will never *actually* do business with you.
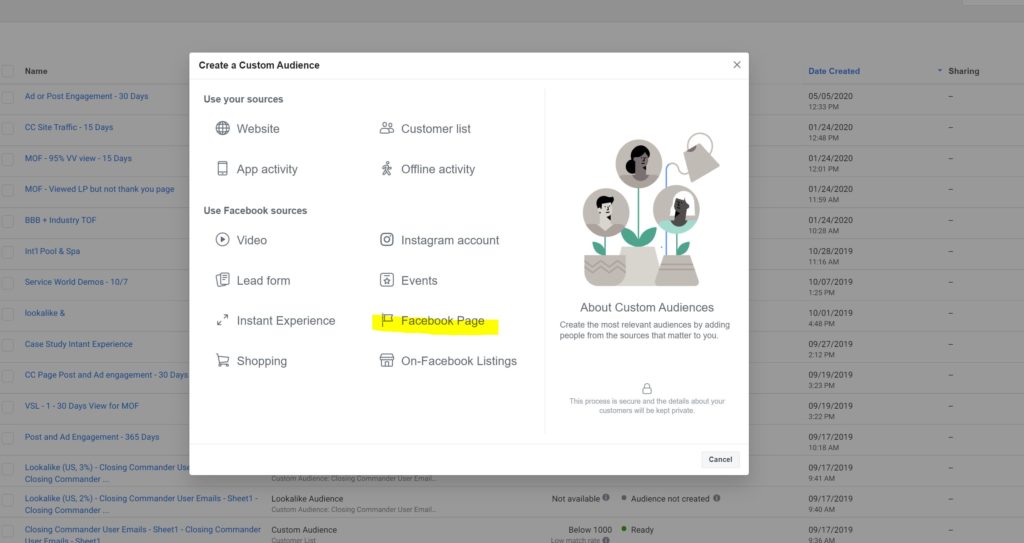
#5 Facebook page engagement audience
The final audience you’ll want to set up before you get started is also a custom audience. This audience will consist of people who have engaged with your Facebook page. Once again, you’ll click on “Create Audience” and then Custom Audience,” but this time you’ll select “Facebook Page.”
Next, use the dropdown menu to select “People who engaged with any post or ad.”
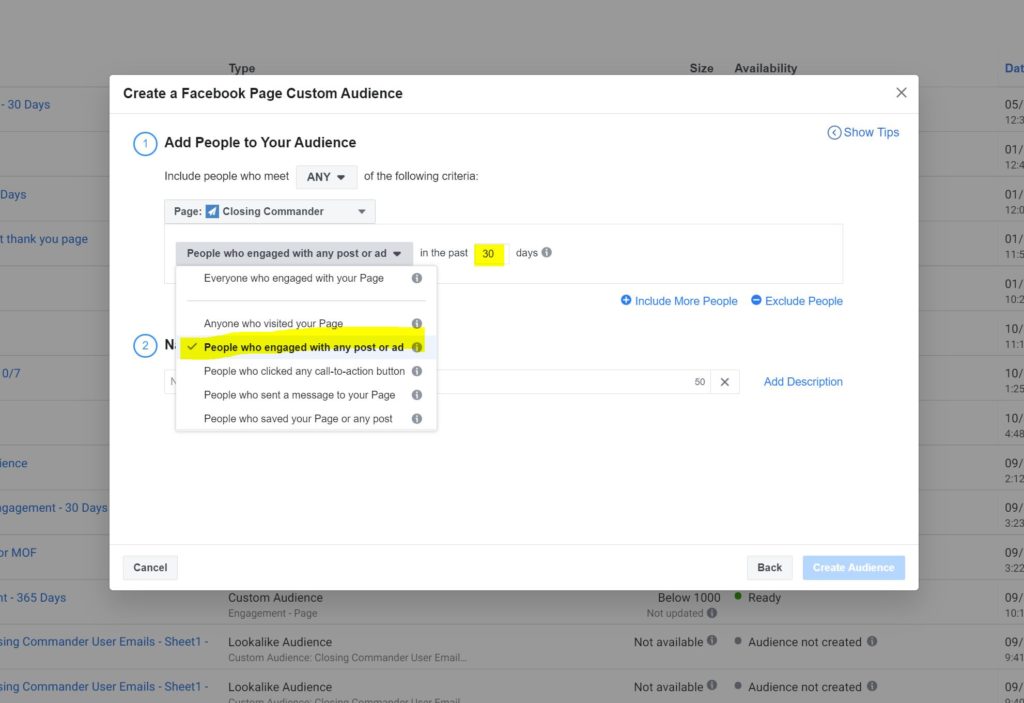
Then Facebook will target anyone who has engaged with your posts or ads in the last 30 days, but hasn’t visited your landing page or taken an action.
Time to Get Things Going!
Alright, now that you know who to target and how to target them, it’s time to create your audiences so you can build your ads, boost your posts, and put Facebook to work for your business.
Best of luck to you!